Showing posts with label shaded. Show all posts

Tuesday, 6 December 2016

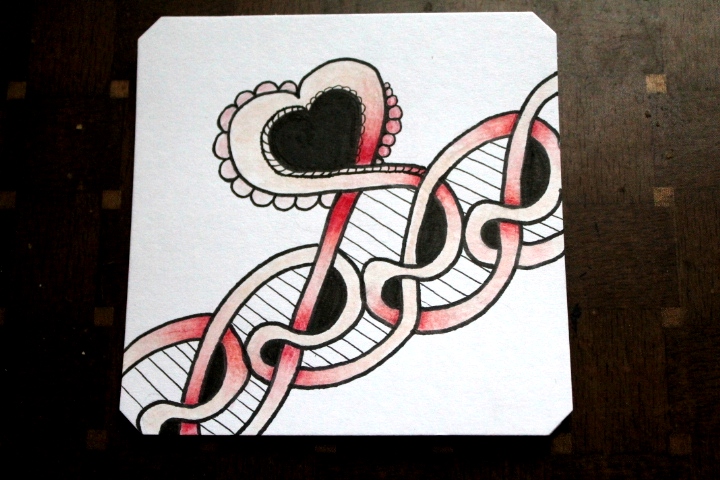
Sindoo Zentangle 1st attempt

Sindoo Zentangle 1st attempt

 
Eni Oken’s challenge this week was the Sindoo Zentangle.  Though this is my first finished attempt, I did practice a few times first – getting those petal shapes to flow takes a few tries.
 
Line art:


Finished piece:

sindoo zentangle
sindoo zentangle


Tuesday, 29 November 2016

Rainking and Meo


Rainking and Meo

Eni Oken set up the challenge to use the Rainking Zentangle in a piece.  I had a hard time staring out with this one.  Looks easy, sure, but mine weren’t exactly popping into place.  So I took a different route with it and added some Meo into the piece as well. 


This is my before piece:


This is the finished piece:


I’ll need to revisit this one another time.

Wednesday, 9 November 2016

Grey Cloudy Smudging with Trelina Zentangle


Grey Cloudy Smudging with Trelina Zentangle


I smudged this tile first with grey pencil crayons (cloudy smudging tutorial here). Then I did the final in my piece in my Trelina training.  I think I’ve got it down now, and figure I’ll be using it quite a lot in future projects. Thanks again to Eni Oken for her amazing pattern(s) and all of the wonderful things she does for the tangling and doodling community.


There is no before pic, because as you can see, my camera was being used to record the video below.  Hope you enjoy!


Tuesday, 8 November 2016

Cloudy Smudging Technique for Tile Backgrounds

Cloudy Smudging Technique for Tile Backgrounds


Trelina and Skye on Cloudy Smudging background

 
There are a bunch of techniques for creating interesting backgrounds for zentangles and doodles.  Watercolors, distress inks, etc.  Here’s a really cheap and easy way to make a funky background. 
I got the idea from my grade 8 art teacher, it's one of the few things I remember from that class.  Turns out it came to good use many (many, many, many,) years later.

All you need is: 

  • A tile or piece of paper
  • A cheap pair of scissors
  • Cheap pencil crayons (in the video I used crayola, not using my prismacolors for this)
  • Tissue
Use the scissors to grate the nib of the pencil crayon onto your tile.  When you have a nice little pile of shavings, use the tissue to color the tile.  I cover my index finger with a good wad of the tissue and use circular motions to cloud up the tile.

You can use the tile right away to tangle or doodle on.

TIP:  My best tip with this method is to use the colors you clouded your tile with to shade and color your final piece.


Here’s a finished tile I did with the Trelina pattern and Skye. 


Enjoy the video, I hope it gives you some ideas to create!

Monday, 7 November 2016

Another Trelina

Another Trelina

 
Yay! I got to play with my new grey tones tiles! Woohoo! And of course, since I’m still working on the Trelina tangle, I incorporated into the piece.  Lots of fun shading on the grey tiles, was able to use a white pencil crayon and really make that white pop (though the pic doesn't do it justice).


Gonna post these in reverse…


First the finished tile


Trelina zentangle after shading


Here’s the before shading tile

Trelina zentangle before shading


And here are the materials I used to make this piece


Sunday, 16 October 2016

3rd Attempt at Trelina Zentangle


3rd Attempt at Trelina Zentangle
 
Okay, so I think I might be starting to actually get the hang of this tangle.  Here I wanted to go with a few of them in one piece, and play around with the pattern; a sure sign of getting into the flow of things.
 
Before pic
 

After shading pic.

Trelina Zentangle Shaded

Thursday, 21 July 2016

First Attempt at B’Dylan Zentangle

First Attempt at B’Dylan Zentangle

 
“The answers m’friend, are blowing in the wind…” 
 
Love, love, LOVE this new tangle pattern!  Easy and fun!  The shading is a little tricky, and I’m not sure if I nailed it, but I’m so very happy with the rest of the shading in this piece.
 
For the first time, I use a “light source”.  Usually I just shade my zentangles based loosely on the light coming from above.  Keep in mind, drawing in general is not in my nature, or wasn’t for the first 37 years of my life.  Until Zentangle came into my life, I didn’t have an artistic bone in my body. 
 
But here! On this tile! I used the light source coming from the somewhat upper right and I think I may have actual done okay! Yay me!
 
So here is the before pic, as you can see I started to shade before remembering to take the before pic.

B'Dylan zentangle
B'Dylan zentangle before shading

 
And here is the final piece!

B'Dylan zentangle
B'Dylan zentangle shaded


Monday, 18 July 2016

Feeling Flux’ed

Feeling Flux’ed

I just had the urge to flux! After my adventures with the Skye Zentangle I started on a larger project… then I wanted that quick fix of a completed tile and since I was feeling a little “KerFLUXed” I figured flux was the way to go. 

I really didn’t have any type of plan on this one – just the urge to flux and away I went. 

Here’s my before shading tile – looks like a bunch of lines really.


flux zentangle before shading

After I shaded it took form but still felt a little lost…


flux zentangle after shading

Then after the shading and adding some background it still didn’t pop. Flux me. *snickersnort* So I added a pop of colour to the bubbles and this is my final piece.  It turned out fluxin’ awesome in my not-so-humble opinion J


flux zentangle
flux zentangle


Friday, 8 July 2016

Big Skye Zentangle


Big Skye Zentangle

Skye Zentangle Shaded


This piece took me quite a while to do, lots of small detail and such.  I used Copic microns and grey Copic markers for the shading.  It’s my final skye zentangle piece for awhile, as it’s time to move on to a different tangle.

Stay tuned for my next post with skye zentangle how-to video and a whole whack load of pictures of the other skye zentangle tiles I’ve completed over the last couple of weeks!


Before pic - just lines


Before all the shading and details were finished pic


Monday, 27 June 2016

Continuing with Skye Zentangle

Continuing with Skye Zentangle
 
I’m really starting to get the hang of this Skye Zentangle.  It’s certainly not an easy one to master.  Even now after many many tries I still make little booboos. 
 
Anyhooooo… here are the last two I’ve done up.  Played around with a bit of colour on the second one to add a little more pop.  As nice as funky as this pattern is, it can easily get lost without some highlights or darkened lines. The colour certainly helps.

Swirly Skye Zentangle Shaded
Coloured Heart Skye Zentangle

 
No before pics because, honestly, I get really lost in this tangle and totally forget the rest of the world.
 
Stay tuned for more Skye Zentangles, including a video walkthrough on my own little way of doing it.

Thursday, 23 June 2016

Skye Zentangle -2nd Attempt

Skye Zentangle -2nd Attempt

Skye Zentangle Shaded

 
I think I may be starting to get the hang of this tangle.  It hasn’t been an easy one for me to grasp.  Still a lot more practice to be done to get it to flow more naturally from my hand to paper.
 
And look at that! I remembered a before pic! YAY ME!


Friday, 13 May 2016

Finishing up with Ruutz


Finishing Up With Ruutz


A collage of the pieces I managed to do this week


 I’ve had to sneak in tangle time between hospital visits this week and will need to do so for the following few weeks, possibly longer.  My MIL was diagnosed with breast cancer and it has been an exhausting series of appointments and tests and operation prep.

I still managed to get a few tiles in here and there. I was hoping to do Ruutz video, but just haven’t had the time or energy.  But here we have few tiles to finish up the Ruutz week. 

As you can tell, my mind wasn’t really with it, as I began shading just before the before- pic was taken. But hey, kudos to me for remember at all, lol.

Fun little sepia ruutz tile


Ruutz zentangle sepia

Ruutz zentangle sepia


This one was a little more complicated,  here is the before pic a few minutes after I started shading - woopsies

And the final piece all shaded and pretty and schtuff


Ruutz zentangle shaded

Ruutz zentangle shaded

And here is all of the ruutz tiles I managed to pull off over the weekly challenge


Thursday, 5 May 2016

Ruutz and Crux (Sounds like a crime-fighting team)


Double the Challenge, Double the Fun (yet again)

Ruutz and Crux (Sounds like a crime-fighting team)


crux and ruutz zentangle shaded


This week Eni challenged us on her Shading Zentangle Facebook page with her own Ruutz pattern.  At the same time, The Diva challenged us with the Zentangle pattern Crux.  It took a little creative thinking to figure out how to combine these two designs, but I’m pretty pleased with what I worked out.

First I had to practice the Crux design.  I’d already done two previous tiles with Ruutz, but Crux was new to me. 

Here is my first Crux Zentangle Pattern tile.  Kinda pretty eh? Changing the widths of the “petal” and lines can really alter this pattern.

Crux Zentangle Shaded

Then it was on to the double challenge.  Ruutz is a pretty busy pattern on its own, and so is Crux, but I think I made it work. (Patting myself on the back while tooting my own horn and high-fiving myself caused some minor injuries, but fret not, I shall recover)

Here’s the tile before shading:


And the final piece! (Forgive the photo quality, it was overcast here today)


Wednesday, 4 May 2016

2nd Attempt at Ruutz


2nd Attempt at Ruutz

Again working with Eni Oken’s Ruutz Zentangle pattern. This time I DID plan the center design.  I’m not sure if you can see the faded pencil line behind one of the star-lines, I was attempting to do drop-shading there but just couldn’t get it right, so I erased it.  Le sigh.  One of these days I’ll get it right.


Yes again I forgot a before pic.  Something about this tangle makes you want to jump right into the shading.

Maybe I’ll remember for the “double challenge” I’ll be embarking on tomorrow.

Stay tuned!

Tuesday, 3 May 2016

First Attempt at Ruutz Zentangle


First attempt at Ruutz


Ruutz Zentangle Shaded

The Ruutz Zentangle was created by Eni Oken.  The step-out pattern can be found here.  This pattern took a little getting used to, but is fairly simple once you grasp the concept.

I didn’t plan for the leaf pattern… err.. I mean Yes! I planned that leaf pattern and it turned out just as I expected! (I so did not plan the leaf the pattern… sigh.) 

 Because this pattern is so busy, I think the white space works nicely.

 Totally forgot the before pic.

Friday, 29 April 2016

Jaysix Zentangle Again


Jaysix Zentangle Again


Jaysix Zentangle Shaded

I think this will be my last Jaysix focused tangle for a while.  I hope to use it as a filler in the future though, it’s quite versatile and pretty fun.  Be sure to check out Eni’s page with the step out, as this is her awesome design.

Here is the before pic:


Here is a video of me shading in the end of the piece:


And the final pic here:


Check out my other Jaysix Zentangle pieces on this blog too!

Tuesday, 26 April 2016

Jaysix 2nd attempt


Jaysix 2nd attempt


Jaysix Zentangle Shaded

I was playing around with the jaysix zentangle pattern in my head for awhile and thought, “Hmm… what can I do with the ends?”  My first thought was worms or snakes, neither of which I am of, now could I draw, then I thought, “Hey, why not go a little more organic? The jaysix tangle looks a bit like a weaved basket, so why not?” 

Alas, this is what my mind drew up.  I’m pretty fond of it J

Before pic (again, almost forget as the shading is barely started here)


Final piece, lots of shading! Ain’t it perrrty!?!


First Attempt at Jaysix


First Attempt at Jaysix


Jaysix Zentangle Shaded

 Eni Oken’s challenge this week involved a pattern she came up with while playing with Cruze.  She named it Jaysix because it’s always 6 lines.

So this was my first attempt at Jaysix.  The pattern will forever remind me of Bill and Ted’s Excellent Adventure and Bogus Journey because that’s what we were “watching” while I worked on this piece. That tends to happen quite a bit, each pattern I learn reminds me of whatever we threw on the tv while I was drawing.  Since our interests vary drastically, an interesting collage of shows/movies play out in my head when I mix in a few different patterns. 

The pattern itself is fairly simple, but I find myself a little lost when adding a bunch together. It required more practice to get a groove going, but alas, this is my first attempt.

Before Shading:  (as you can see I almost forgot to do this pic as I started to shade)


After shading:


Thursday, 21 April 2016

Yet Another Shnek


Yet Another Shnek


Shnek Zentangle Shaded

Shnek 3 perhaps? Happily Tangling After? I can’t help but see “shnek” and think of Shrek. Anyhooo… I’ve loved playing around with this shnek zentangle, it’s been a lot of fun and it is very versatile.  I went a little nuts with the holes/bubbles here.  I wanted them to sort of look like holes, but I’ll take bubbles instead.  Tis the Zentangle way after all.

Will step out the variation on Shnek – coming soon to an internet near you.

Totally forgot to take a before pic… again.

Tuesday, 19 April 2016

Shnek Zentangle 1st attempt

Shnek Zentangle 1st attempt


Shnek Zentangle Shaded

This is my first attempt at the Shnek zentangle, and will be a contribution to Eni’s Mosaic project.  Once you get your groove ging with this tangle it’s a lot of fun.  I’m already looking forward to working it into the Diva’s spring has sprung challenge and may have come up with a variation for it.  It has inspired lots of ideas for tiles for the week!

It means I’m slacking on my mega project, but when the muse hits, you gotta pay attention and take advantage.

Pretty basic before pic:


Added fillers and started shading before I remembered to snap a pic


Finished with shading!