Showing posts with label doodling. Show all posts

Monday, 23 January 2017

Girls Night In

Girls Night In


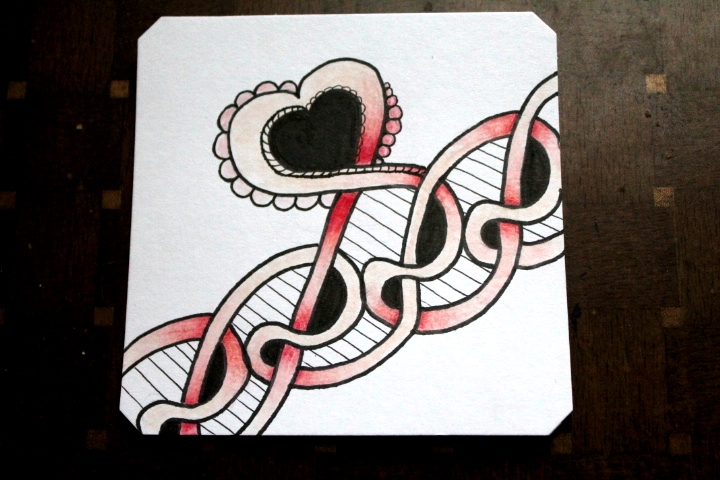
I've been dabbling with this piece for a while.  I wanted to do something girly, something that reminded me of sleepover parties.  Even as adults out girls night in would involve unprecedented calorie consumption, and make overs or spa treatments.

I may try to turn it into a colouring page at some point...


Here is the finished piece whole.  Scroll down for close up pics.


Sunday, 15 January 2017

5th Play With Stella

5th Play With Stella


Thought I'd get my practice on a little more with Stella and my distress inks.  No before pics this time just some playing around. I'm loving the backgrounds with the distress inks, I've got to try to get the water droplet effect going.  Apparently I've been doing it wrong.  Just spritzing the paper doesn't do the trick, which I tried below.  All it did was curl up the paper and make it harder to work with.  Should I have read the instruction booklet first? Yeah probably...

Stella Zentangle on Distress ink background


Saturday, 7 January 2017

3rd Attempt at Stella Zentangle

3rd Attempt at Stella Zentangle


Looks like I landed back on snowflakes again.  This tangle is really sending me all over the place! Falling from the sky and sailing the seas. 


Here is the finished piece:


Stella Zentangle Snowflakes

And here is the line art:


Thursday, 15 December 2016

Sindoo #5

Sindoo #5

 
I’m gonna have Mambo #5 stuck in my head all night now. Oh woah is me, the things we do for art.  Anyhoo, I’m nearing the end of my Sindoo Zentangle adventure.  It’s been quite a ride.  For an easy tangle it certainly has a lot of versatility to it.
 
This piece was created with a bit of topsy turviness, black and white. And since winter is heavily upon us in the Great White North, a little starry snowflake type design was added to the middle.
 
Finished piece first:

Sindoo Zentangle
Sindoo Zentangle


Line work:


Wednesday, 7 December 2016

3rd Sindoo #Zentangle tile


3rd Sindoo #Zentangle tile


Third times the charm right? Either that or it was just time to get really crazy! I wanted some free-floating sindoos to play with, so that’s what I did.  I also wanted to really play around with the different ways this tangle can be filled in.  I used a pencil for loose grid lines, scattered here and there throughout the tile, then got my sindoo-on. 


A couple of before pics this time…


Here’s the finished piece:

Sindoo Zentangle freeform


Here’s the piece I started to fill in then remembered to grab the camera:


And here is the final line work before shading.


2nd Attempt at Sindoo Zentangle


2nd Attempt at Sindoo Zentangle


I wanted to spice things up a little with this 2nd Sindoo piece, so I added and extra layer to the “petals” and softened the piece up with some Skye on the sides.  It still didn’t feel “finished” to me, so I added the lines between the “flowers”.  What can I say? I see them as flowers.


Here’s the finished piece:

Sindoo Zentangle
Sindoo Zentangle


Here’s the line art:


Thursday, 1 December 2016

Ilana Zentangle


Ilana Zentangle


Again this week the Diva Challenge prompted us to use a grid tangle. This time though, the challenge was to mix it up, to move the pattern around to give it a different effect. 


I searched through tangles to find one that would work with this idea, a good part of them simply can’t be switched up as they fit the whole square.  Then I came upon the Ilana tangle and decided to give it a try.  Somehow it wound up looking more like b’dylan gone awry, but I think it works.


Finished piece:
Ilana Grid (b'dylan)


Before pic:

Ilana Grid (b'dylan)

Wednesday, 16 November 2016

Zentangle with Distress Inks


Zentangle with Distress Inks


First Zentangle Tile with Distress Inks


This is my first attempt as using distress inks for my background. I love, love, LOVE it! So much fun! I didn’t use the mister-effect because I was anxious to get started on the tangling right away, so I didn’t care to wait for it to dry.  I plan on doing a whole lot more with these distress inks so stay tuned!


For this piece I went with a little Helen Williams style for the tangle, I wanted something that would flow and allow me to shade in different tones.  I used a regular tile, distress inks, micron .1 and .05, a gold prismacolor pencil crayon, a white prismacolor pencil crayon and a white jelly roll.  **Note: White pencil crayon just lightens and blends, does not work as white exactly on top of the distress ink.


No before pics as I got carried away  J

Friday, 11 November 2016

Eaxy Zentangle

Eaxy Zentangle


The Eaxy Zentangle was the Diva’s challenge this week.  It took a little harder to get used to than I expected.  A few tiles were chucked out while I tried to get the hang of this Eaxy.  Also included Eni Oken's Ruutz.
 
Check out the Diva’s challenge here
Check out Nadine Roller’s Eaxy step-out here
 
Line work before pic:
 
eaxy zentangle line work


After shading:


eaxy zentangle shaded

Wednesday, 9 November 2016

Grey Cloudy Smudging with Trelina Zentangle


Grey Cloudy Smudging with Trelina Zentangle


I smudged this tile first with grey pencil crayons (cloudy smudging tutorial here). Then I did the final in my piece in my Trelina training.  I think I’ve got it down now, and figure I’ll be using it quite a lot in future projects. Thanks again to Eni Oken for her amazing pattern(s) and all of the wonderful things she does for the tangling and doodling community.


There is no before pic, because as you can see, my camera was being used to record the video below.  Hope you enjoy!


Wednesday, 28 September 2016

First Attempt at Trelina Zentangle


First Attempt at Trelina Zentangle
 
I’ve been zentangle-absent for the summer, taking advantage of the nice weather as much as possible before the brutal winter hits my little Canadian town.  I’ve been working sporadically on a larger piece in my downtime which I’m looking forward to share upon its completion.
 
In the meantime, I’d been admiring the Trelina Zentangle work of other zentanglers on the Shading Zentangle facebook page.  Thank you Eni Oken! Admiring them so much, I just had to give it a try.  Boy oh boy, was it ever a whole lot more difficult than I expected it to be.
 
I haven’t gotten the hang of yet, not quite.  But below is my first attempt.  I didn’t stop to take a before pic, because I was struggling so much with getting the pattern down.  I’ll be working on getting the hang of this until I do.  I'm predicting plenty more attempt-posts to come!

trelina zentangle shaded
Trelina Zentangle

Thursday, 21 July 2016

First Attempt at B’Dylan Zentangle

First Attempt at B’Dylan Zentangle

 
“The answers m’friend, are blowing in the wind…” 
 
Love, love, LOVE this new tangle pattern!  Easy and fun!  The shading is a little tricky, and I’m not sure if I nailed it, but I’m so very happy with the rest of the shading in this piece.
 
For the first time, I use a “light source”.  Usually I just shade my zentangles based loosely on the light coming from above.  Keep in mind, drawing in general is not in my nature, or wasn’t for the first 37 years of my life.  Until Zentangle came into my life, I didn’t have an artistic bone in my body. 
 
But here! On this tile! I used the light source coming from the somewhat upper right and I think I may have actual done okay! Yay me!
 
So here is the before pic, as you can see I started to shade before remembering to take the before pic.

B'Dylan zentangle
B'Dylan zentangle before shading

 
And here is the final piece!

B'Dylan zentangle
B'Dylan zentangle shaded


Monday, 18 July 2016

Feeling Flux’ed

Feeling Flux’ed

I just had the urge to flux! After my adventures with the Skye Zentangle I started on a larger project… then I wanted that quick fix of a completed tile and since I was feeling a little “KerFLUXed” I figured flux was the way to go. 

I really didn’t have any type of plan on this one – just the urge to flux and away I went. 

Here’s my before shading tile – looks like a bunch of lines really.


flux zentangle before shading

After I shaded it took form but still felt a little lost…


flux zentangle after shading

Then after the shading and adding some background it still didn’t pop. Flux me. *snickersnort* So I added a pop of colour to the bubbles and this is my final piece.  It turned out fluxin’ awesome in my not-so-humble opinion J


flux zentangle
flux zentangle


Wednesday, 13 July 2016

Peace of Art

Peace of Art


The Diva’s challenge for the week was to produce a peace-themed piece.  It’s been a sad week.  Not a lot of peace around these days.


Stop the hate.

Make peace.

Be kind to yourself.

Be kind to the earth.

Be kind to others. 

It all sounds so simple, yet… 


Before Pic.


After Pic.


Monday, 11 July 2016

All Things Skye Zentangle

All Things Skye Zentangle


The Skye Zentangle was created by Margaret Bremner and she really gets all of the credit here.  What an amazing pattern to create! 

I had a tough time getting the hang of this tangle. Hence the obsession with it and multiple Skye tiles/pieces.  I might have gotten a wee bit carried away on this one, but when I love a pattern, I want to get it right, and I want to learn it in a way that it will become second nature for me to draw it up on the spot.   

There are probably many different approaches to this tangle.  This video gives you the basics you need to get started.


 Changing the size of the loops and the longer lines can really alter the look of this design.  


Here are a few of my the pieces you might have already seen, but they really show some of the variations this pattern can have.


Skye Zentangle
Skye Zentangle


And finally, a look at all of my Skye Tangly goodness together in one shot. 


Skye Zentangle
Skye Zentangle


Friday, 8 July 2016

Big Skye Zentangle


Big Skye Zentangle

Skye Zentangle Shaded


This piece took me quite a while to do, lots of small detail and such.  I used Copic microns and grey Copic markers for the shading.  It’s my final skye zentangle piece for awhile, as it’s time to move on to a different tangle.

Stay tuned for my next post with skye zentangle how-to video and a whole whack load of pictures of the other skye zentangle tiles I’ve completed over the last couple of weeks!


Before pic - just lines


Before all the shading and details were finished pic


Monday, 27 June 2016

Continuing with Skye Zentangle

Continuing with Skye Zentangle
 
I’m really starting to get the hang of this Skye Zentangle.  It’s certainly not an easy one to master.  Even now after many many tries I still make little booboos. 
 
Anyhooooo… here are the last two I’ve done up.  Played around with a bit of colour on the second one to add a little more pop.  As nice as funky as this pattern is, it can easily get lost without some highlights or darkened lines. The colour certainly helps.

Swirly Skye Zentangle Shaded
Coloured Heart Skye Zentangle

 
No before pics because, honestly, I get really lost in this tangle and totally forget the rest of the world.
 
Stay tuned for more Skye Zentangles, including a video walkthrough on my own little way of doing it.

Thursday, 5 May 2016

Ruutz and Crux (Sounds like a crime-fighting team)


Double the Challenge, Double the Fun (yet again)

Ruutz and Crux (Sounds like a crime-fighting team)


crux and ruutz zentangle shaded


This week Eni challenged us on her Shading Zentangle Facebook page with her own Ruutz pattern.  At the same time, The Diva challenged us with the Zentangle pattern Crux.  It took a little creative thinking to figure out how to combine these two designs, but I’m pretty pleased with what I worked out.

First I had to practice the Crux design.  I’d already done two previous tiles with Ruutz, but Crux was new to me. 

Here is my first Crux Zentangle Pattern tile.  Kinda pretty eh? Changing the widths of the “petal” and lines can really alter this pattern.

Crux Zentangle Shaded

Then it was on to the double challenge.  Ruutz is a pretty busy pattern on its own, and so is Crux, but I think I made it work. (Patting myself on the back while tooting my own horn and high-fiving myself caused some minor injuries, but fret not, I shall recover)

Here’s the tile before shading:


And the final piece! (Forgive the photo quality, it was overcast here today)


Wednesday, 4 May 2016

2nd Attempt at Ruutz


2nd Attempt at Ruutz

Again working with Eni Oken’s Ruutz Zentangle pattern. This time I DID plan the center design.  I’m not sure if you can see the faded pencil line behind one of the star-lines, I was attempting to do drop-shading there but just couldn’t get it right, so I erased it.  Le sigh.  One of these days I’ll get it right.


Yes again I forgot a before pic.  Something about this tangle makes you want to jump right into the shading.

Maybe I’ll remember for the “double challenge” I’ll be embarking on tomorrow.

Stay tuned!

Thursday, 28 April 2016

Double the Challenge, Double the Fun! (again)


Double the Challenge, Double the Fun!


Jaysix and stripes challenge shaded

 Here we go again, another double challenge featuring Eni’s challenge of using Jaysix and the Diva’s challenge of using stripes. It took me a while to figure out how to combine these two.  I considered using Jaysix within the stripes, but this way seemed a lot more fun.

It was time-consuming, I will say that.

Before detail and shading

Finished!