Tuesday, 29 May 2018

The Never-Ending Tree


The Never-Ending Tree


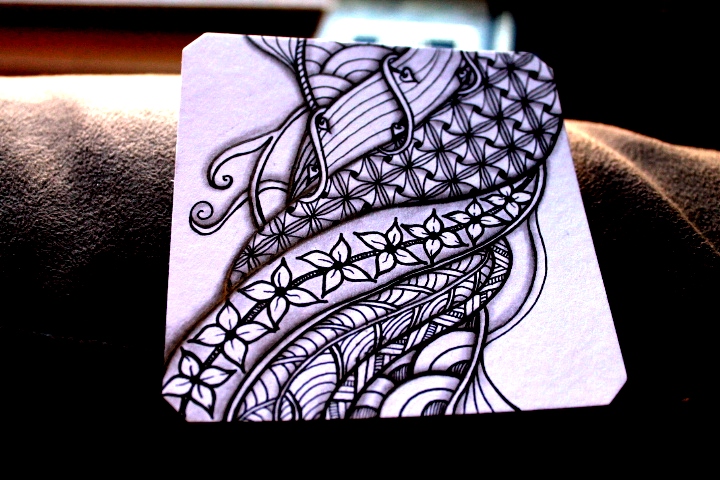
I started this tree sometime last year.  I took a bunch of pictures on my progress as I went along, but then my computer passed away suddenly, and took all of its memories with it. T’was a sad, sad day. 

What I remember from when I started, was that I wanted to use the Rope String as my base for the tree.  I’ve wanted to use it as a base for a tree since I first played with it.  So that’s how it began…

I hit a snag doing the border. It wasn't originally all black - it had a funky design and was to be coloured in blues.  But I messed it up... at around 2am this morning.  So I coloured it in all black and it'll just have to do :)

One of the most valuable lessons I’ve learned (other than to backup my stuff) working a piece that takes a long time, with many delays, is that though my colourful Copic Markers are amazing tools, their brilliance fades over time, not unlike a highlighter.  I’ve been meaning to move onto watercolours and watching this fade-out has giving me that extra push to do so.

Regardless, here is my tree in all of its finished glory.


Wednesday, 14 March 2018

Spinner Zentangle Pattern

Spinner Zentangle

(by Jo Flaherty)

Spinner is a Jo Flaherty original tangle. Join her facebook page called "Zia tips, tricks and techniques" for all of your tangly-goodness needs!

I've posted a few of my pieces below, featuring the Spinner tangle, followed by a video showing my basic rundown of Jo's design. You can have so much fun with this simple tangle, it's not hard to do at all and adding to it is really easy.  Pop onto the facebook page and see what others have done with this pattern, it's truly spectacular!

So here goes

1st attempt

Spinner zentangle
Spinner zentangle

2nd attempt - with a little splash of colour

Spinner zentangle
Spinner zentangle

3rd attempt - went bigger here, and really got into it.

Spinner zentangle
Spinner zentangle

And finally, got a little busy on this one and played with colour a whole lot more.  Sadly, my puppers got a hold of it overnight and gave it a little chew...

Spinner zentangle
Spinner zentangle


And alas, the little video tutorial...


Tuesday, 30 January 2018

Sun for Jo

Sun for Jo!


Jo's on a cruise and threw us the challenge to make a Sun Piece to commemorate her journey.

For the background I used distress inks. I use a makeup sponge to apply it and get this look.

distress background
distress background

Next came the line art. Used a Copic Micron 1.0 and .1


Finally the finished product!!

Zentangle sun with distress ink background

Tuesday, 23 January 2018

Jo's Underwater Challenge

Jo's Underwater Challenge


Jo (check out her fb page ZIA tips, tricks and techniques) put out a challenge for an underwater scene.  Which, of course, is a ton of fun!

Here's my efforts at the challenge.  I used the WRONG kind of paper.  After using distress inks on the background, I used my lovely copic microns to draw the base. No problems there. But then when I attempted to add colour with my prismacolor pencils, the paper tore as I tried to add the colour. :( 

I repaired as I could and trudged on. 

Distress Ink Background


Line Art


Under the sea zentangle Zia Finished

Friday, 19 January 2018

Tangled bowls

Tangled Bowls


It's long after christmas so this is a little late, but these are some of the bowls I made as gifts. Click HERE for my tips and tricks on working with porcelain/ceramics.

Zentangle bowl
Zentangle bowl

Zentangle bowl
Zentangle bowl


Zentangle bowl
Zentangle bowl


all wrapped up!
After the drawing and cooking is done on the pots, I make my yummy "christmas crack", caramelized soda crackers with chocolate chips on top and add them into the bowls then wrap them with cellophane.

Thursday, 23 November 2017

2nd Attempt at Roids

2nd Attempt at Roids


This is my 2nd attempt at roids. Still playing with the tombows for that colour pop! 


Roids zentangle
Roids zentangle


Kinds posted these backwards, but here's the shading before the colour

Roids zentangle


And here is the line art before shading


Tuesday, 21 November 2017

Roids first attempt

Roids first attempt


This is my first attempt at the Roids Pattern By Lizzie Mayne. Something about it caught my eye and made me wanna play with it. 

I've been working on more tiles since this first one, and it's a whole lotta fun!

I used copic greys, microns, and tombow markers on this one.

Here's the stages:

Roids Zentangle
Roids Zentangle line work
Roids Zentangle
Roids zentangle shaded
Roids Zentangle
Roids zentangle with colour
Roids Zentangle
Roids zentangle finished 

Stay tunes for more Roids pieces!

Sunday, 25 June 2017

Back from MIA with Scallamp


Back from MIA with Scallamp


I’ve been a little MIA lately – I started on a larger piece, and as Eni Oken has said many times, it’s good to work on smaller pieces because of that quick-to-have sense of accomplishment.  She was so right.  I’ve been waiting on the markers I need to finish the big piece, and haven’t been tangling much since.  I finally realized a few days ago that it was time to put the large piece aside, and get some tiles done – play around with some patterns, get back to the things I love.


So I went through the tanglepatterns.com site and flipped through the top bar til I found a tangle that inspired me.  I found Sara Uram’s pattern Scallamp and thought, YES! This is for me! 


So here it is, my first tile in a long while. I did many that first night as a warm up, played with some distressed backgrounds too – I’ll include the second tile as well.


Stay tuned for the larger piece… it’ll get finished… someday…


Monday, 6 March 2017

Rope string with Yew Dee

Rope string with Yew Dee


The Zen n Zia facebook group posted this very cool Rope String at the same time as Eni Oken’s Shading Zentangle group posted the Yew Dee tangle challenge. So I put the two together and voila!
 
I love this rope string! I know it’s supposed to be rope, but it reminds me of a gnarled tree, and I may just be using this string for trees in the very near future.

You can find the rope string step out here
The Yew Dee step out is here
 
Here is my line art


And here is my finished piece


Monday, 27 February 2017

All Things Hamadox


All things Hamadox


The Diva put up the Hamadox challenge by Diana Shruer.  Original post with step out sheet here. 


So basically, Hamadox is a mashup of Hamadail and paradox.  Now that’s a pretty cool tangle. I wasn’t particularly pleased with the outcome when I did a typical paradox center, so I rounded it off a bit and I was much happier with the results.  You can see what I’m talking about in my video here:


Originally, I didn't notice that the sheet on Diana Shruer's page showed the rounded edges - in fact I just noticed now as I was searching for the link to share here.  That would have saved me a lot of time trying to figure it out - woopsies!


At the bottom of this page you'll find the 3 pieces I've done with Hamadox.  Click on the link associated with any of the photos to see the full posts and line art etc. for each piece.

 
1st attempt - full post here


2nd attempt - full post here


3rd attempt - full post here


Do you have a blog with a Hamadox Zentangle post on it? Add the link to your Hamadox Zentangle post below so others can view your work!  (please do not link to your main page, just the post with a Hamadox  zentangle on it)


Wednesday, 22 February 2017

3rd attempt at Hamadox

3rd Attempt at Hamadox


Hamadox Zentangle with Distress inks

 
I just love this Hamadox thing! This time I used my trusty Distress inks to play with the colouring.   I wasn’t initially going to do any background colour, but I dropped my wet paintbrush on the paper as I was reaching for my water, and well, que sera, sera.


I’ve included loads of progressive pics here, so have a gander and follow me along on this little journey.  If you have any questions at all about the processes I used, don’t be shy, I’m happy to answer!
 
Oh! But before we get to the progressive pics - here's a video on my little twist to Hamadox.


Just the line art, though I did almost forget to take the pic and started some of the colour.


 Here I've done the ribbons with my usual makeshift paint palette made of up the tinfoil from my smoke pack.


 I've started to fill in the colour here, then dropped my brush and worked a bit on the background


 Everything looks better with a little pink!


Almost done! Just need to shade and highlight!


And finally the finished piece...


These are the main inks I used here:


And this is the pink I used as well:


Ranger Tim Holtz Distress Ink Pads, Mini, Victorian Velvet


Monday, 20 February 2017

2nd Attempt at Hamadox


2nd Attempt at Hamadox


So this is part 2 of my Hamadox adventure.  You can see part 1 here.  This time around I got a little more playful with my Tombows and with the Hamadox pattern.  I remembered to take a few pics this time as I went along. Hope you enjoy!

Finished piece:

Hamadox Zentangle
Hamadox Zentangle


This is the work leading up to the finished piece:


Please feel free to ask me any questions about my work - I'm happy to share any experience or technique or whatever you might want to know :)


Friday, 17 February 2017

1st Attempt at Hamadox

1st Attempt at Hamadox


Hamadox (Diana Schreur): what a funky idea! It's a mixture between paradox and hamail.  I didn't like the way it looked when I first tried it out (you can see a bunch of my attempts in the background paper of my lineart picture). So I tried a little something different.  Give me a few days and you'll be able to see the video of how I tweaked it to my liking.

In the meantime, I had fun with this piece.  I used my Towbow marker to give that orange pop of colour and I love it.

That's my puppy's fur in the right corner of the pic - she was hogging the natural light from the window :) 


Hamadox Zentangle
Hamadox Zentangle


And here is the line art, a few moments after I started shading  - woopsies!


You can see there in the background that I played around with getting the hang of this before I started on the tile.


Thursday, 16 February 2017

Valentine's Day Tangle


My Tangled Valentine


It took me a few days to get this one done. Quite a few layers of stuff going on here.  The fun part is that I used very few tools to put this piece together.


Of course I used my microns, but more excitedly, I used one Tombow red watercolour marker and the clear brush that comes in the set to add all of the red and pink in this piece.  I used my trusty HB Staetdler pencil to shade beyond the reds/pinks, and that’s really all I used.  Usually, my little “art table” (which is really more of a tv dinner tray on wobbly legs) is filled to the edges with all sorts of pens, markers, pencils, pencil crayons, etc. etc. ad nauseum.  Not this time though – Paper, microns, pencil, 1 marker, 1 marker blender and one blending stick.  I’m pretty proud of that, and very impressed with the lack of clean up required after.


Here is the finished piece:


Here is the line art


The tools I used


Wednesday, 8 February 2017

2nd Attempt at Neuron Zentangle


2nd Attempt at Neuron Zentangle


So I went for the Neuron Zentangle again, but this time I also included Hamail in order to prepare myself for the Diva challenge of Hamadox. It involved using Paradox and Hamail Zentangles.  More on that to come…


I used my trusty copics for the colouring in the Hamail, and then just a basic HB3Staetdler pencil for shading the rest – and as usual, I used my copic microns.  This time, for the background, I used the grey copic markers as well.  (links for these items at the bottom of this post).


The Hamail tangle took me a few tries before I could get it right and even still, I struggled. The original walkthrough can be found here: https://www.pinterest.com/pin/110760472062404322/


Here is my before piece:


And here the finished piece:


Neuron and Hamail Zentangle


Tuesday, 7 February 2017

1st Attempt at Neuron Zentangle

1st Attempt at Neuron Zentangle


Okay so the title here is a bit of a lie - this is actually my second attempt at the Neuron Zentangle, but the first one was so awful I wound up using the paper as a tester for combination colors.  Yeah, it was that bad. 

Seems to be the general consensus that not many are fond of this tangle - yeah, me neither.  I might do a few pieces with it - but really, it's not very fun.  It's kind of like a tangle within a tangle, or more to the point, a string within a string. But - it was a challenge, and I may have a few more of these pieces up my sleeve.


I used copic markers for the colouring in this, hb3 pencil for shading and copic microns. I used a white pencil crayon for the highlights.


Here's the finished piece:

Neuron Zentangle
Neuron Zentangle


And here is the before shading piece


These are the copic markers I used for the colour